
The Ubiquiti ToughSwitch Carrier features dual ToughSwitch PoE PRO systems in a rack-mountable, 1U form factor with 300 watts of power supporting up to 16 devices. Ubiquiti ToughSwitch Carrier 16 Port Key Features
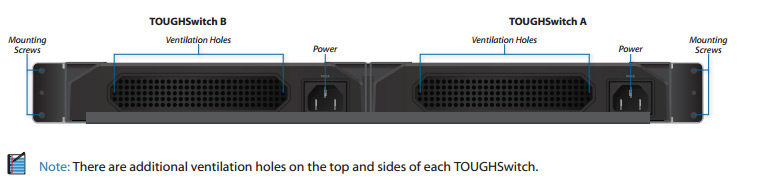 Front Panel 
Before and After ToughSwitch Deployment  Ubiquiti ToughSwitch 16 Port PoE Carrier Technical Specifications Dimensions
Unit Weight
Hardware Configuration
Mounting
General
LEDs Per Port
Networking Interfaces
|
Configuring the ToughSwitch PoE
Carrier
ToughSwitch A and B have the same default IP address, 192.168.1.20, so you will need to change the IP address of
at least one ToughSwitch. Follow the instructions in this section to configure one TOUGHSwitch at a time.
- Configure the Ethernet adapter on your host systemwith a static IP address on the 192.168.1.x subnet (e.g.192.168.1.100).
- Launch your web browser. Type https://192.168.1.20in the address field. Press enter (PC) or return (Mac).
- The login screen will appear. Enter ubnt in theUsername and Password fields. Click Login
- Change the Static Management IP Address to a unique IP address on the Device tab. Click Save Changes.
- You can enable PoE on the Ports tab and customize additional settings as needed.
- Disconnect the Ethernet cable from the Management port of ToughSwitch A and connect it to the Management port of ToughSwitch B.
Then repeat steps 1-5 on ToughSwitch B.
Setting up the ports. Expand We are going to set the ports 1-4 for Vlans 200, Ports 5-7 for Vlan1 and have port 8 be the truck. On VLAN1 set ports 1-4 to exclude and port 5-8 to untag. On VALN200 set ports 1-4 to untag and set ports 5-7 to exclude.Set port 8 to Tag on VLAN 200 and untag on VLAN1. It should look something like this.Click Save Changes if you want to add more VLANs and having port 8 as the trunk. Just tagging port 8 on each VLAN.
Conclusion : You should now have working vlans on your tough switch.
